How to manage recipients in MailEach (search, tags and bulk actions)
Once your recipients are imported, the Leads view is where you search, filter, tag and tidy them. This guide walks through every tool on that screen. Searching and filtering recipients The toolbar…
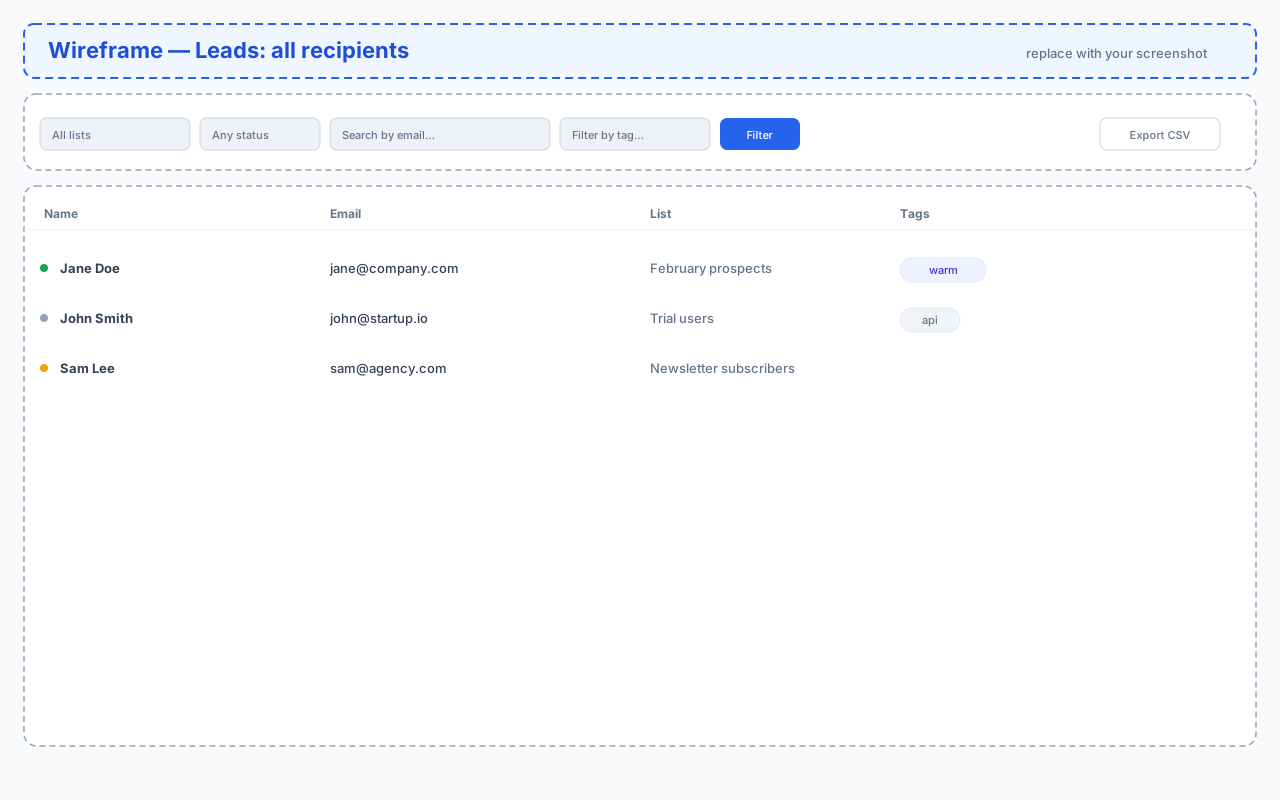
Once your recipients are imported, the Leads view is where you search, filter, tag and tidy them. This guide walks through every tool on that screen.
Searching and filtering recipients
The toolbar above the table lets you narrow the list by list, status, search text and tag. Combine them — for example, show only verified recipients in a specific list that match a search term.
Understanding recipient statuses
Each recipient has a status shown as a colored dot next to their name:
- Pending — not yet verified or contacted.
- Verified — the address is known good.
- Bounced — delivery failed; review and remove it from active lists.
- Unsubscribed — the recipient opted out; MailEach stops sending to them automatically.
Editing a recipient's name
Click a recipient's name to edit it inline — type the new name and press Enter. Personal names help your sequences address people correctly.
Working with tags
Tags are free-form labels you can attach to recipients (for example "warm", "api", "ceo"). Click the + in the Tags column to add one, click a tag to rename it, or click its × to remove it. Tags let you filter and segment without creating a new list.
Bulk actions
Tick the checkboxes on the left, then use the bar that appears to act on all selected recipients at once.
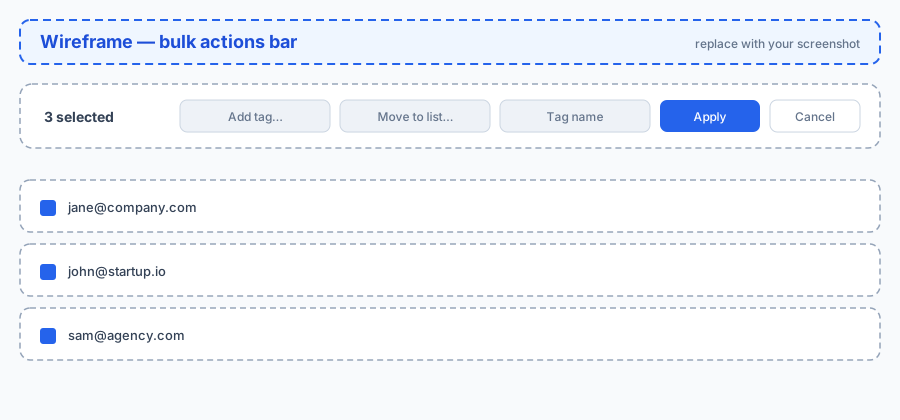
Add tag
Choose Add tag…, type a tag name, and apply it to every selected recipient.
Move to list
Choose Move to list… and pick the destination list to relocate the selected recipients.
Delete
Owners can remove selected recipients permanently. Deleting a recipient here doesn't affect your other lists.
Adding recipients one at a time
At the bottom of the view there's a quick-add form — choose a list, enter an email (and optional name and tag), and click Add recipient.
Exporting your list
Use Export CSV to download the currently filtered recipients as a spreadsheet — handy for backups or moving data elsewhere.
Next steps
With your recipients organized, tagged and clean, you're ready to build a sequence. See our Sequences guides next.